Overview
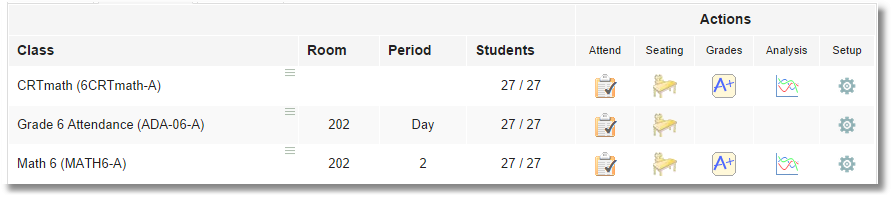
When teachers log in they will see a list of all their classes which have been set up.
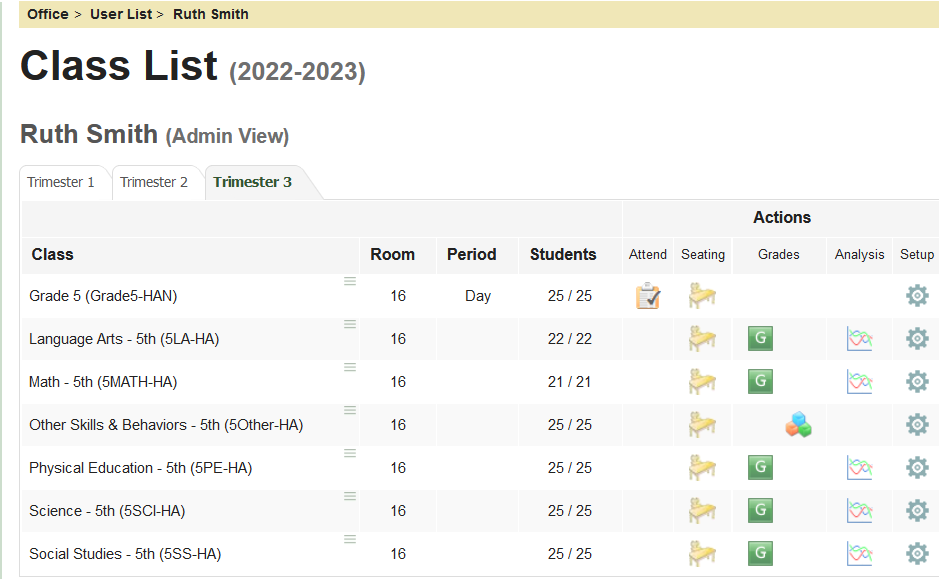
The gradebook data is shown in separate tabs that align with your marking periods (such as semesters, quarters, or trimesters).

Attendance
From the home screen, clicking on the Attend button for a class opens the attendance form.
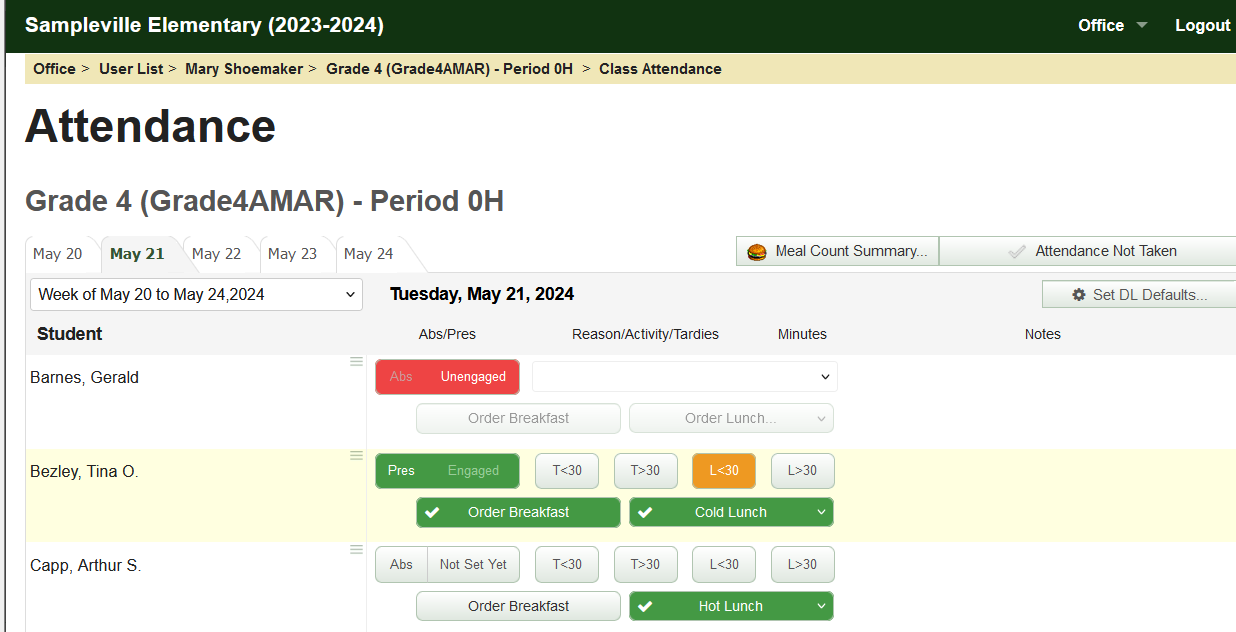
Simply clicking on Abs marks a student absent. Clicking it again recinds the absent (making them present).
If the student is late, click the Tardy < 30 (less than 30 minutes) or Tardy > 30 (greater than 30 minutes).
If the student leaves early, click the Leave < 30 (less than 30 minutes) or Leave > 30 (greater than 30 minutes).
The notes field allows you to make a note in the attendance record.
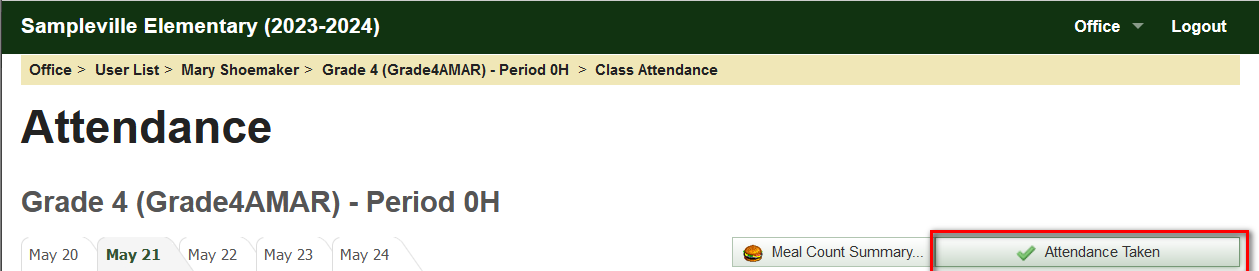
When you have completed taking attendance you should click the attendance status button changing it to "Attendance Taken".
Once the attendance supervisor verifies the absences, the gradebook attendance will be locked for auditing purposes and you won’t be able to edit it any more.
Important: For self-contained classes (not period-by-period attendance) you should only take attendance in the class with a period of Day. For middle and high schools using period attendance, you would take attendance every period, but for an elementary school you would only record attendance once per day.
The Grade 4 gradebook shown above with a period of Day is not an academic class and should not be used to enter grades. It is a homeroom and should only be used for recording attendance.
Seating
The Seating button opens up a seating chart. The seating chart simply allows you to drag student names around, forming a classroom seating chart which can be printed. You can add as many rows and columns as you wish.
Grades
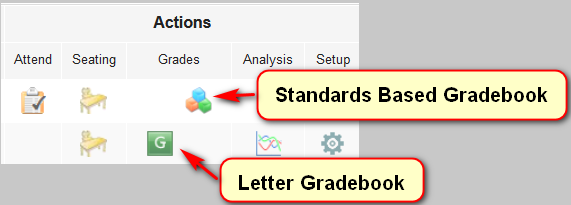
The gradebook link identifies the gradebook type. Clicking on the green Grades button opens the letter gradebook for that particular course. Clicking on the building block Grades button opens the standards-based gradebook for that particular course.
Setup
![]()
At the far right side of your list of classes is a setup gear symbol. The Setup button duplicates some of the functions in the gradebook (explained in a later section) and displays printable activation code lists for students and parents.
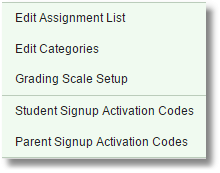
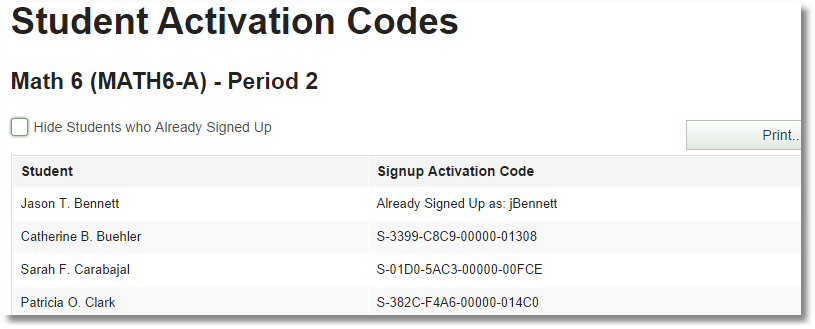
Clicking Student Activation Codes or Parent Activation Codes brings up a printable list of activation codes.
These can be printed and given to the students/parents to enable them to sign up for web accounts to the student portal where they can see their grades (if enabled). The school also has the option of printing letters from SchoolWise with the parent activation codes.
Context Menu
The three little horizontal lines used in various places bring up context menus.
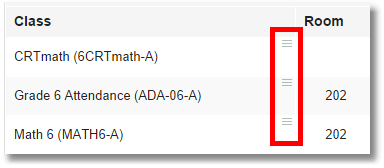
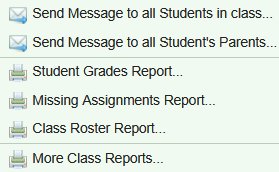
When viewing a gradebook class list, click on the context menu to see links to additional class information.
Gradebook Options
Once a specific gradebook has been opened, additional options and information is available.
Click the Gradebook Options link to define additional settings that affect the gradebook information.
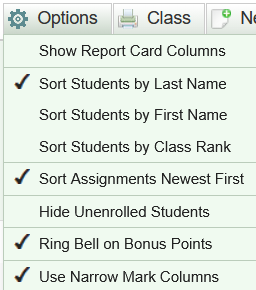
Tip: If the gradebook roster is missing a student who has been unenrolled from the course, that is because the gradebook is set to hide unenrolled students. If you want to sell all students that have been enrolled in the course, just click the gradebook options link and uncheck 'Hide Unenrolled Students'.
When viewing a gradebook roster list, click on the context menu for a student to see links to additional student information.
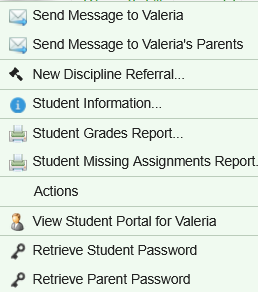
Student Information provides quick access to essential information.
Reports: Some gradebooks include links to specific reports such as the Student Grades Report as well as the Student Missing Assignments Report (which will retrieve assignments where you have entered a score of M for missing).
View Student Portal provides a view of what the student-parent portal looks like for the selected student.
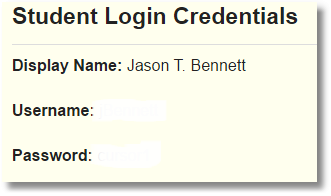
Retrieve Password Password brings up the form shown displaying the student’s or parent’s web account username and password.
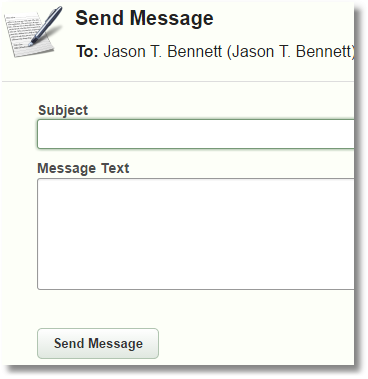
Teacher Messaging System - Send Message to brings up a form where you can send a message to a student or parent if they have created a SchoolWise web account. If they have not created a web account you will not be able to send messages and the option will be grayed-out. Click here for more information.