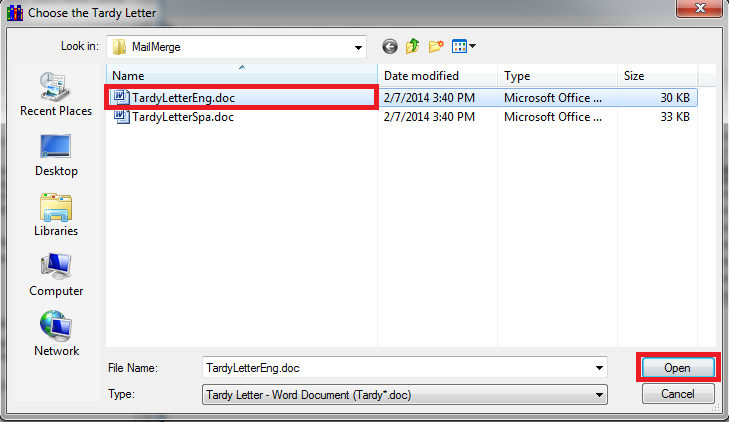
The first time you run a Mail Merge report in SchoolWise, generic templates will automatically download to your computer. A message will pop up on-screen notifying you of this action and it will indicate the location where the documents were saved. The default location is in C:\SchoolWise\MailMerge. Every time you run a mail merge report, a window will pop up asking for the location of the letter. Go to that folder and select the letter and click 'Open'.

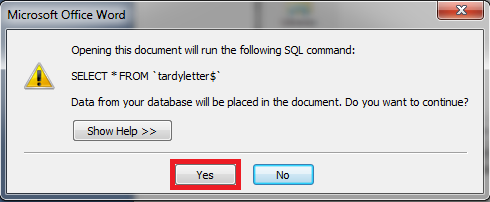
Microsoft Word will launch and you'll be prompted to allow for the connection of the data with the letter. Choose 'Yes'.

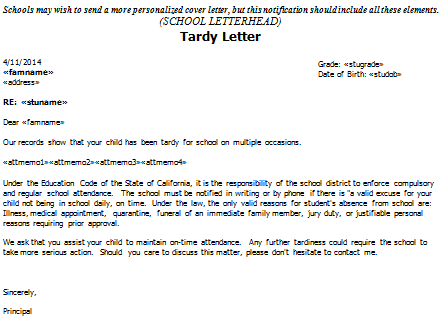
The first time you run the report you'll see a letter like the one to the right. Because it is a Word document you can edit it just the same as any other document. The words that are encased in << >> are the data elements that are pulled from a table. Those are the fields that are 'merged' into the document. It is advisable to leave those elements 'as-is'. When you are done modifying the letter, be sure to save it so that it is all set for next time.

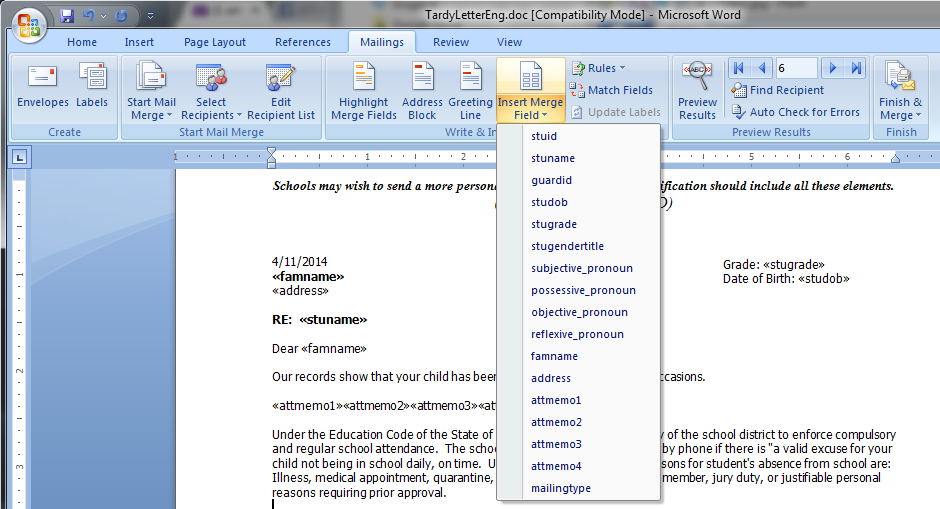
In Word 2007 and newer, you can click the Mailings tab on the top menu. If you accidentally remove mail merge fields and want to re-add them or add more personalized information (like gender based pronouns), you can click the 'Insert Merge Field' to see all fields that are available.

To preview the letter, click the 'Preview Results' button.
When you are ready to print the letters, select 'Finish & Merge' and then 'Print Documents'.

Whenever you need to print a new letter with updated information (ie. different date range, different amount of tardies/absences etc.), run the report from SchoolWise. This will update the data that is 'merged' into the letter. Be sure to close any open letter before running the report.
To save multiple versions of a letter, be sure to follow the appropriate naming convention as detailed in the report description. If you need additional help, please contact James@SchoolWise.com.