Enrollment Overview
Students must be enrolled in a school before they can be enrolled in any course or activity list.
Students must be enrolled in an ADA class before they can be enrolled in an academic course.
Click on the Enrollment button on the left side of the screen to open this form.

The Enrollment form and Attendnace form only show one calendar track at a time. You only see course sections that use the selected calendar track. The regular ADA calendar track is normally shown by default. If a course uses an alternate calendar track (such as the ELP track), you have to select that alternate calendar track from the pulldown in the top right corner of the form.

Set the Show Period pulldown to see ADA Classes or All Periods to see all the academic classes. You can filter the list by choosing a specific period.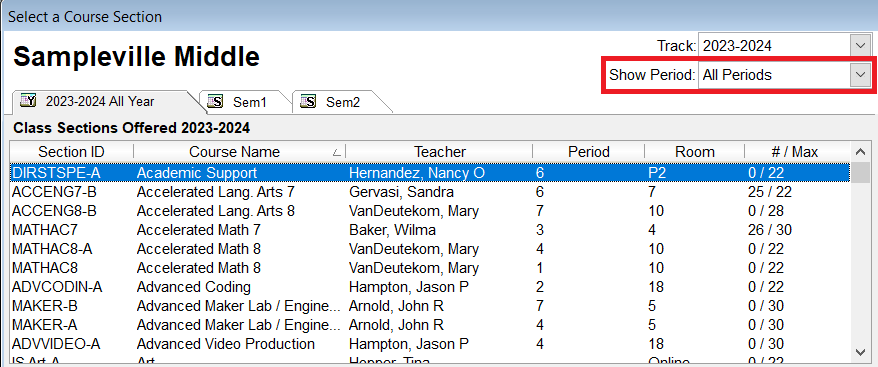
The course section list can be filtered using the course name or teacher. The course section enrollment counts column includes 3 numbers (A/T/M) for Active enrollments, Total enrollments, and Max allowed (guideline only - not enforced).
Bulk Enrollment
The easiest way to enroll students into their Grade Levels is using the Bulk Enrollment Tool. Launch the Enrollment Form from the toolbar and click on the class section you wish to enroll students into. If you can’t see the section that you are looking for remember that you can sort each column alpha-numerically by clicking on the column header. Once you have selected the class click OK or double click class to launch the Enrollment Form.
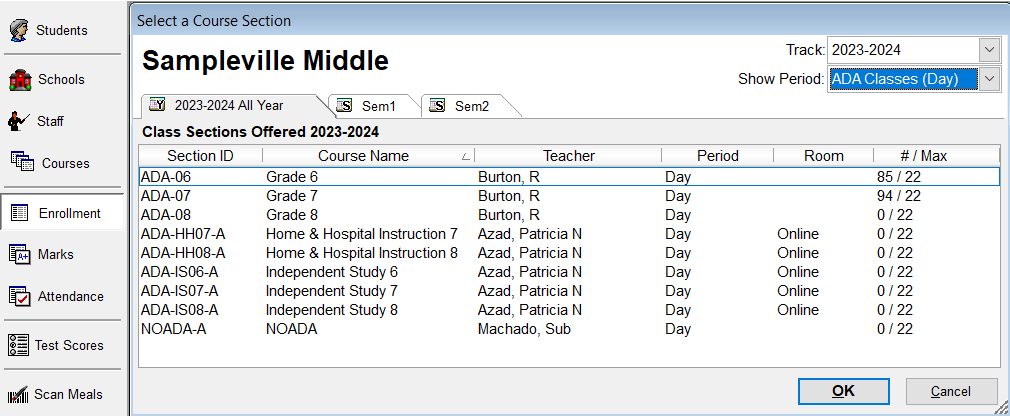
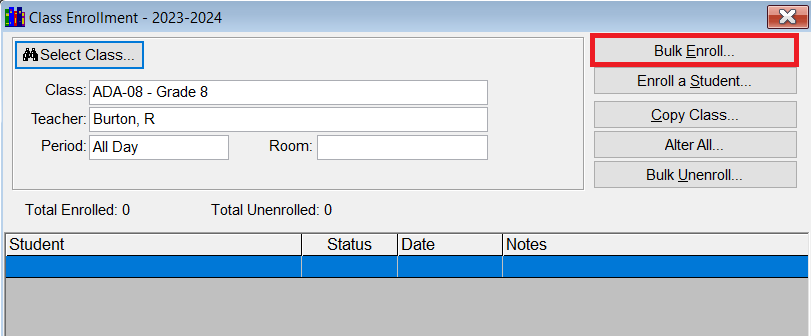
Select the section (either highlight and click OK or double-click). Click the Bulk Enroll button to the right to enroll all the students into the class.
Choose the grade level from the Show students in Grade pulldown menu and then select the Enroll on Date.
You should see the list of students on the left that can be moved by clicking on the double arrows (>>) or one by one with the single arrow (>). Click OK when done.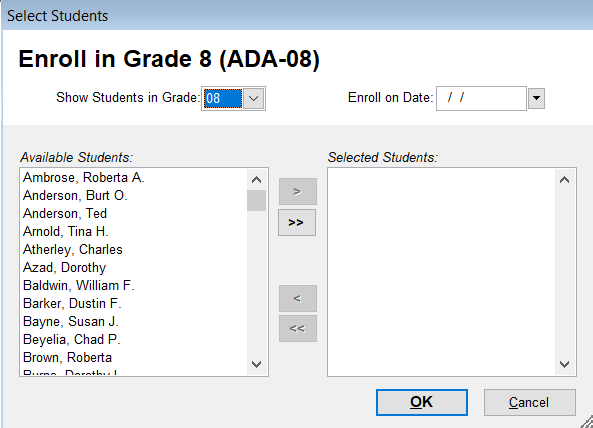
Note: You can only bulk enroll a student in a specific course once (to minimize bulk enrollment errors). The available student list will exclude students who have already been enrolled in that specific course. You can enroll an individual student in different sections of a specific course (you just can’t use the bulk enrollment tool).
Regular Enrollment
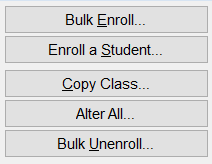
You may use the Enrollment Form to enroll a single student using the Enroll a Student button instead. 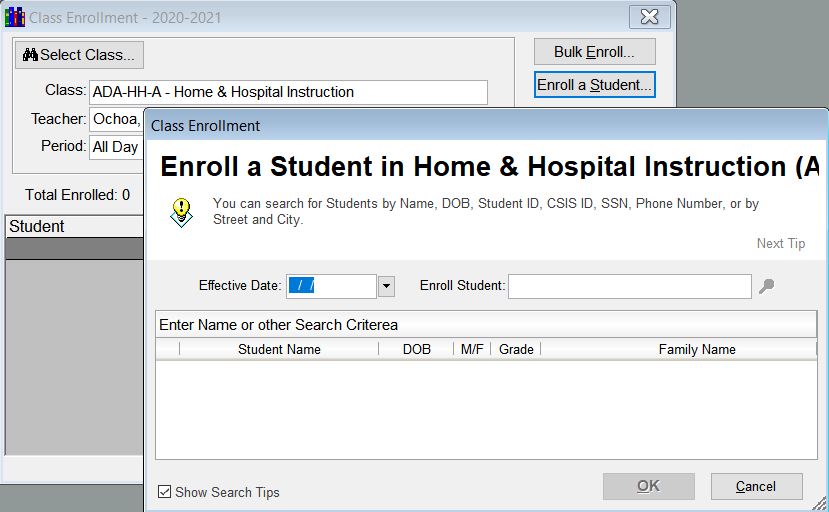
Student Form Enrollment Tab
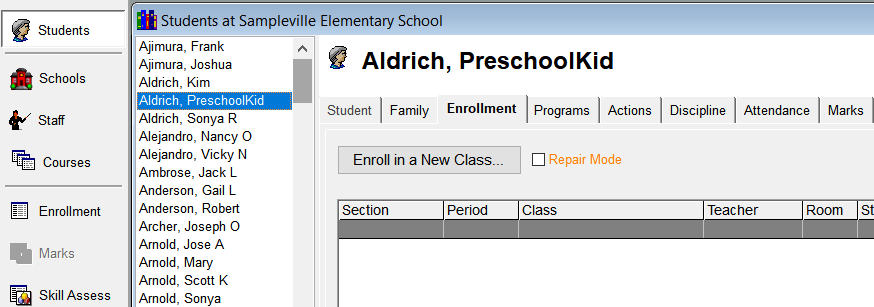
Another way to enroll an individual student into classes is by using the Student Form Enrollment Tab and selecting the Enroll in a new Class button.
Academic Course Section Enrollment
On the Enrollment Form the Copy Class button can be used to copy the students from one class into another. This is useful when students in a grade level have identical schedules. For elementary schools, the easiest way to load these classes is to actually open the ADA self-contained homeroom and then copy the enrollment to each of the academic classes.
To do this, click the Select Class button and open up a homeroom.
The enrollment form now opens with all of the students in the homeroom class. 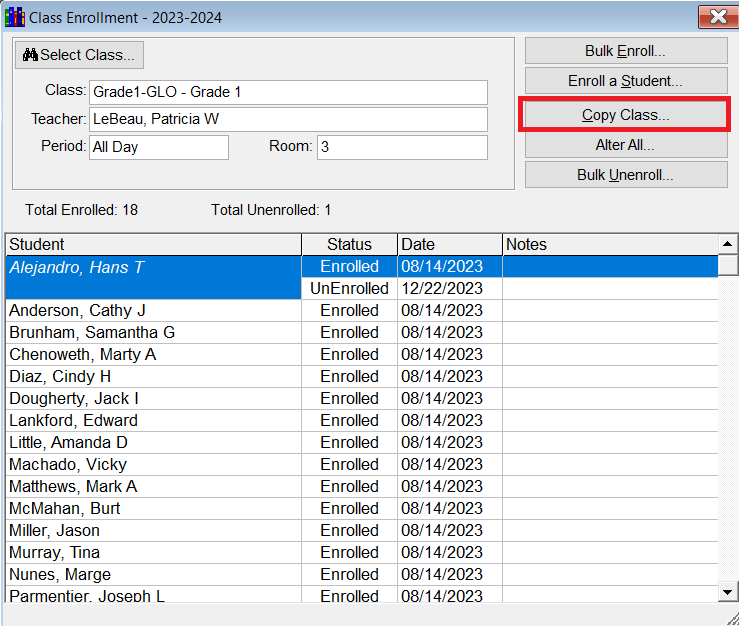 To copy the enrollment to academic classes, click the Copy Class button.
Be sure to set the date to the first day of school.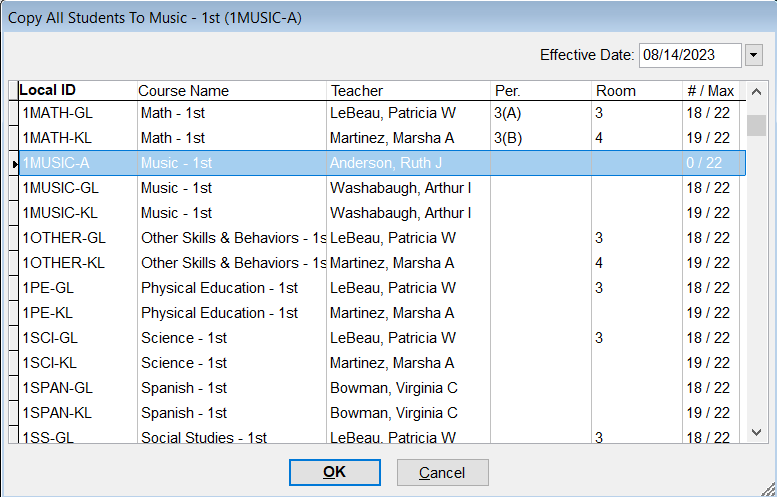
Notice that the numbers enrolled shown on the right side. The 1MUSIC-A (Music - 1st) class shows an enrollment of 0. As you are copying enrollments this helps you not reload a class you have already worked on.
Choose a class and the enrollment will be copied.

If you open the class that you copied to, you will see the same students enrolled in that class.
Repeat the process for all of the enrollments.
Time Saver Tip: As you copy the enrollment from the ADA class to the academic classes, each time the list of target classes opens you must enter the effective date.

As you continue to copy classes, press the period key on your keyboard as soon as the target class list opens, and the last used date will be entered into the effective date field which saves you from retyping it again and again.
Enrollment Changes
Go to the Student Form Enrollment tab and right-click to access the enrollment change menu.
or
Go to the main Enrollment tab, select the desired course section, and right-click to access the enrollment change menu.
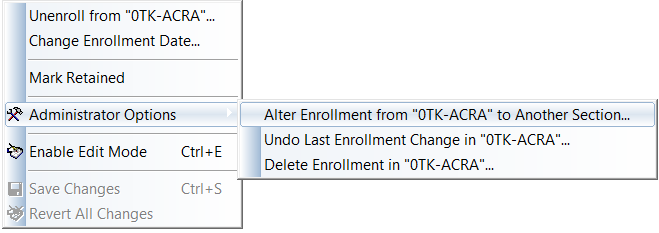
Unenroll: If a student is being transferred from one course section to another, they should be unenrolled from the current course section and then enrolled in another course section. This process maintains any marks (gradebook assignment/assessment scores) that have already been created. Select the Unenroll option from the top of the enrollment change menu.
Bulk Unenroll: You can bulk unenroll students from a course section if you have the “Power User” privilege. Go to the main Enrollment tab, select the desired course section, and click 'Bulk Unenroll'. Select the students to unenroll and the effective date (the last day of attendance).
Alter Enrollment: You can alter the enrollment from one course section to another if the course sections are the same RecType and ScheduleType, even if attendance exceptions are present. Select Alter Enrollment from the Administrator Options menu. This tool is useful if a student has mistakenly been enrolled in the wrong course section.
Alter All: You can alter the enrollment of all students from one course section to another if you have the “Power User” privilege.
Note: This alter function should only be used to correct an enrollment error (ex. if all students have mistakenly been enrolled in the wrong course section).
Delete Enrollment: Select Delete Enrollment from the Administrator Options menu to delete a student from a course section. “Delete Enrollment” checks for attendance and marks. The “Delete Enrollment” privilege by itself will only allow deletes of section enrollment when no attendance or marks exist. The “Power User” privilege is also required to delete a section enrollment if there are any attendance or mark records.
Note: This delete function should only be used to correct an enrollment error (ex. if a student was mistakenly enrolled in a course section but never attended class).
Delete All: You can delete all students from a course section if you have the “Power User” privilege. Go to the main Enrollment tab, select the desired course section, right-click to access the enrollment change menu Adminstrator Options, and select 'Delete All Students'.
Note: This delete function should only be used to correct an enrollment error (ex. if students were mistakenly enrolled in a course section that is not being taught).
