School Enrollment Overview
The SchoolWise Desktop app Student Enrollment form allows you to enroll, unenroll, or re-enroll a student in school and shows all historical school enrollment records.
Refer to the CALPADS Statewide Student Identifier (SSID) and Enrollment Procedures for information regarding submitting and maintaining enrollment and exit data.
School Enrollment Considerations
- A student must be enrolled in a school before they can be enrolled in any course or activity.
- A student can be enrolled in school on any in-session date (ADA calendar track or ELP 365 day extended calendar track).
- Enrollment Start Date: The school enrollment start date should reflect the first date that a student was expected to attend a particular school for a period of enrollment.
- Enrollment Exit Date: The last date that a student was expected to attend within a specific enrollment period.
- Beginning in the 2025-2026 fiscal school year, Expanded Learning Program and Attendance Recovery records must be reported to CALPADS for the entire fiscal school year (July 1 – June 30). The school enrollment start date should be set accordingly to accommodate enrollment in ELP or AR courses that may start prior to the first instructional day in the regular academic school year. Existing CALPADS SENR records may need corrected (using the Replace transaction type) if a LEA needs to change the school enrollment start date to an earlier date to enroll a student in an ELP or AR course so they can backfill missing attendance records.
- The California Department of Education (CDE) operates on a fiscal school year that runs from July 1 to June 30. The student grade level is applicable for the fiscal school year.
- School enrollment supports alternate enrollment types running concurrently with primary enrollment.
School Enrollment Status Code
- Primary Enrollment (Code 10)
- Secondary Enrollment (Code 20)
- Short-Term Enrollment (Code 30)
- Non-ADA Enrollment (Code 50)
When can I enter new students into SchoolWise?
You can enter new student records at any time in SchoolWise. You can pre-enroll new students or re-enroll former students in a school at any time. The calendar for the new school year does not have to be setup if you want to pre-enroll a student on the first day of school in the new school year (the calendar needs setup if you want to pre-enroll a student on a specific date). The rollover from the current school year to the upcoming school year does not have to be complete to enroll students in the new school year. The only limitation is that students can't be pre-enrolled in a class for the upcoming school year until after rollover has been completed. Class scheduling for the new school year can’t be done in the live SIS database until after rollover to accommodate grade level changes and school enrollment changes.
School Enrollment Instructions for a New Student
To enroll a new student in school, use the SchoolWise Web app online registration system (this reduces your data entry work) or the SchoolWise Desktop app Student Enrollment form per the following instructions:
1. Open the Students form.
2. Click the new button in the top left toolbar or right-click the student list and select ‘Add a new Student/Family’.
3. Follow the wizard instructions to add a new student and enroll in school. The enrollment start date and enrollment type is required to enroll a student.
You can enroll a student on ‘The First Day of School Year’ or you can use ‘This Date’ to select a specific in-session date defined in the school calendar (ADA calendar track or ELP 365 day extended calendar track).
4. Grade Reminder: The grade level in the top right corner of the student tab needs to be assigned when you enroll a student.
School Enrollment Instructions for a Former Student
To re-enroll a former student in school, use the SchoolWise Desktop app Student Enrollment form per the following instructions:
1. Open the Students form.
2. Use the find command (select from the menu or enter Command/Ctrl+F on your keyboard) to open a search box so you can search for a student name or parent name. This can be used to find a current student (enrolled), a former student (unenrolled), or a student who was never enrolled (a student record was created, but they were never enrolled in school). Select the student you want to re-enroll and click ok to load the student record.
3. Click the Enrollment – School Enrollment form and right-click to re-enroll the student. The enrollment start date and enrollment type is required to enroll a student.
You can enroll a student on ‘The First Day of School Year’ or you can use ‘This Date’ to select a specific in-session date defined in the school calendar (ADA calendar track or ELP 365 day extended calendar track).
4. Grade Reminder: Be aware that the end-of-year rollover auto-advance grade level only works for currently enrolled students. Please review and update the grade level in the top right corner of the student form when a former student is re-enrolled. We have no way of knowing what educational progress was made during the enrollment gap time period.
School Unenrollment Instructions
When a student leaves the school, they should ALWAYS be unenrolled using the School Enrollment form.
The exit date and exit reason (exit code) is required to unenroll a student.
You can unenroll a student on ‘The Last Day of School Year’ or you can use ‘This Date’ to select a specific in-session date defined in the school calendar (ADA calendar track or ELP 365 day extended calendar track).
Click here for more information regarding the unenrollment process.
School Enrollment Changes
A) You can make enrollment span changes in the past using the split or merge functions:
Split = split a continuous span into 2 spans with a gap in the middle.
Merge = merge 2 spans into 1 continuous span.
B) The school enrollment entry date can be changed as follows:
1. Open the Students form.
2. Left-click the Enrollment – School Enrollment form.
3. Right-click the school enrollment record and select ‘Edit Entry Values’.
4. Change the ‘First Day Enrolled’ date
C) The school enrollment exit date can be changed as follows:
1. Open the Students form.
2. Left-click the Enrollment – School Enrollment form.
3. Right-click the school enrollment record and select ‘Edit Exit Values’.
4. Change the ‘Last Day in School’ date.
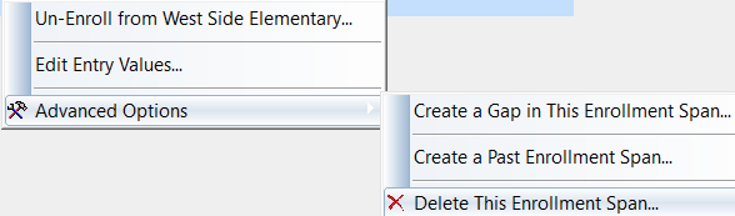
D) If a student has been pre-enrolled in school but you need to rescind their school enrollment, you can delete the school enrollment record without deleting the student records. This will allow you to re-enroll the student in school at a future date without re-entering all the student records.
1. Open the Students form.
2. Left-click the Enrollment – School Enrollment form.
3. Right-click the school enrollment record and select ‘Advanced Options'.
4. Select ‘Delete This Enrollment Span’.
What to do about a No Show Student?
Refer to this article for advice: https://schoolwisehelp.freshdesk.com/support/solutions/articles/48001242414-what-to-do-about-a-no-show-student-
- Additional guidance can be found in the CALPADS Statewide Student Identifier (SSID) and Enrollment Procedures.
How to delete a student from your SIS
There are some situations where you may want to delete a student record from your SIS. This can be done if there are no historical records associated with the student (attendance, marks, etc.).
Ex. A duplicate student record was created by enrolling a student in school more than once. Click here for more Duplicate Student Management Tips.
Ex. A pre-enrollment record for the student was created in your SIS but the student was never actually enrolled in school (never attended). Note: If you believe the student may enroll in your school in the near future, you can just delete the current school enrollment record but leave the student record in the SIS.
You can delete a student from your SIS per the following procedure:
1. Open the student form for the student you wish to delete and navigate to the Enrollment Page – Class Schedule tab.
2. Any associated records that have been mistakenly created (ex. attendance records) need to be deleted.
3. Right-click on each academic subject class and delete those enrollment records one at a time by choosing Administrator Options – Delete Enrollment in.
4. Right-click on the Day level (0H – or Grade level) class and delete that record by choosing Administrator Options – Delete Enrollment in.
5. Click on the School Enrollment tab, right-click on the school enrollment record, select Advanced Options, then select Delete This Enrollment Span.
6. Right-click the student’s name in the student form and select Delete this Student.
School Transfer Records

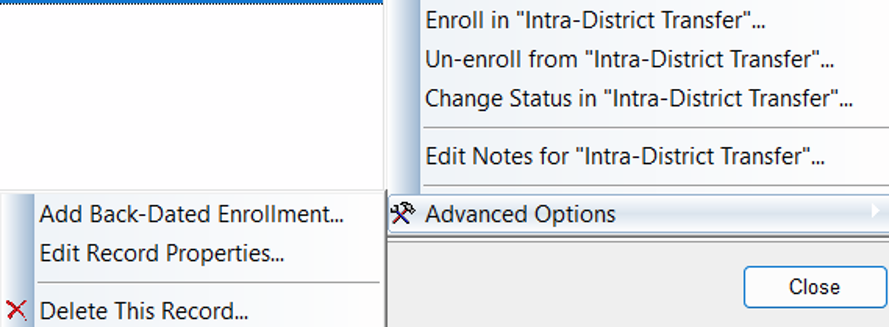
School transfer records (Inter-District and Intra-District) can be managed in the 'Students – Enrollment – School Enrollment' form or in the 'Students – Programs' form (school transfer records are normally hidden in the Programs form unless you check 'Show All Programs' in the top right corner).
To create a transfer record, left-click or right-click on the transfer field to create an enrollment record.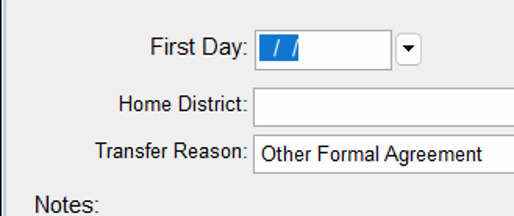
To change a transfer record, right-click on the transfer field and choose the desired action.
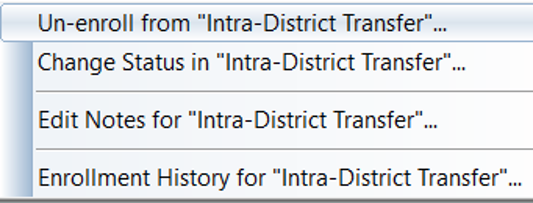
'Advanced Options' are available if you left-click the transfer record or right-click and select ‘Enrollment History’.