

Everything Starts with the Household
(The Student/Family Relationship and the Home Address)
Before entering a student in SchoolWise, you need to create a Family. In SchoolWise, a "Family" or Household is made up of at least one primary contact and one student. Due to state laws and CALPADS guidelines, students need to be associated with one primary residence (legal address). SchoolWise calls this the Household Address (Home Address). In the real world students can have multiple addresses due to various custody situations, but for the purposes of the SchoolWise SIS database, the Household Address (Home Address) is the address that is sent up to CALPADS and is considered the student's primary address (legal address).
Household contacts are defined as parents/guardians (commonly a Father and Mother). The Primary and Secondary contacts should be the main contacts at the primary household address. Each Family can also contain children and/or siblings who are (or have ever been) enrolled in any school in the district under the care/guardianship of these contacts and at this same address.
Once a new family is created in the SchoolWise database, students can then be added to that Family. A student cannot be added without a Family. Even if that family is only one guardian or a care center. The SchoolWise Family (based on primary address) is the container for the student.
It's important to understand that a SchoolWise "Family" record is defined at the district level. A Family may have several children, each enrolled in a different school in the district, but there will be only one Family record that is shared by all of those students.
Example: the "Mr. & Mrs. Smith" family may have 2 children, Mary and Sam. Mary is enrolled in the Elementary school, and Sam is enrolled in the Middle school. In this case, the "Mr. & Mrs. Smith" family record will be visible in the Elementary School family list, and also in the Middle School family list.
Any changes to the Family information that is made at one school will affect all schools with students in that family.
Example: in the "Mr. & Mrs. Smith" family we used above, say Mr. Smith calls the Elementary School where Mary attends, to give them his new cell phone number. The Elementary School will then enter the new cell phone number. Later, if the Middle School where Sam is enrolled needs to call his father, they will look him up and find the new cell phone number – event though Mr. Smith only told the Elementary School about the new number. The same applies to family address information, notes, and all extended family member information.
For more details on important functions of the Family Page, please check out this article: https://help.schoolwise.com/docs/family-form-overview
Student Family Record Management Tips
Duplicate Student Tip: Sometimes a new student record (StuD) may have been created by mistake when enrolling a student. Duplicate student records need to be reconciled.
It is better to keep your old student record (old StuID) so you don’t lose any historical data.
To reconcile duplicate student records, you should compare the new student record vs the old student record to see if there are any key differences. If needed, edit the old student record to add new information that is relevant. If the new student record was created via online registration, the new student enrollment application forms are available for reference.
Enroll or re-enroll the student using the old student record (old StuID).
Unenroll and delete the enrollment records for the new student record (new StuID). Then right-click the student name in the student form to delete the record.
Duplicate Family Tip: Sometimes a new family record (FamID) may have been created by mistake when enrolling a student instead of adding the student to an existing family record (FamID). You can move a student from one family record (FamID) to another so you have one consolidated household. Refer to the instructions above for ‘How Do I Move a Student to a Different Family’.
Blended Family Tip: Sometimes two families need to be combined into one blended family. You can move a student from one family record (FamID) to another so you have one consolidated household. Refer to the instructions ‘How Do I Move a Student to a Different Family’.
Split Family Tip: Sometimes a new family record (FamID) may need to be created to separate family members if the parents are splitting up. You need 2 different FamID records to separate the family members.
Create a new FamID by creating a new record for the parent that is moving to a different address. Copy the appropriate information for this new parent record from the original FamID record to the new FamID record. Then delete this parent from the original FamID record.
Then move the associated students to the new FamID record (as described above).
Then add other contacts to the new FamID record as needed and delete them from the original FamID record if no longer needed.
Foster Student Tip: If a student is now living with a different foster family, the best practice is to move the student from the old family to the new family. Don’t edit the old family records by changing the foster parent names or deleting the old foster parents. Editing old family records is a bad practice as it will impact records associated with the old FamID.
How Do I Add a New Student/Family?
STEP 1 - Click on the Student Form button ![]() to open it.
to open it.
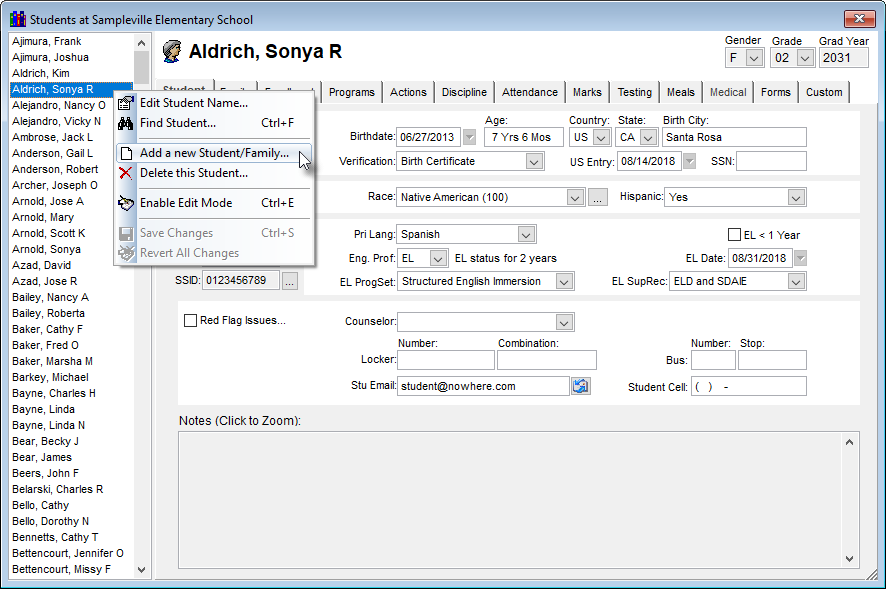
Left click on the very first Icon in the Primary Navigation Toolbar ![]() (a picture of a blank piece of white paper) to launch the Add a new Student/Family form. You may also “Right click” on the active student list and select Add new Student/Family from the same menu – as seen below:
(a picture of a blank piece of white paper) to launch the Add a new Student/Family form. You may also “Right click” on the active student list and select Add new Student/Family from the same menu – as seen below:
STEP 2 - Once the Add a new Student/Family wizard is open you should see the Primary and Secondary contact entry screen (Parent 1 & 2). The first contact is the Primary and all families require at least one primary contact parent/guardian name. The Secondary contact is optional and can be filled in here as well. In most cases the two main contacts are where the student resides most of the time (the primary household address). Enter at least one contact name and click on Next.
SchoolWise will then search the database to see if there are any families already in the system with that same name. If a match is found – the form will display the list of possible matches to choose from, select one and click next to proceed. If it doesn’t find a match you will see the CALPADS required information screen on STEP 3... 
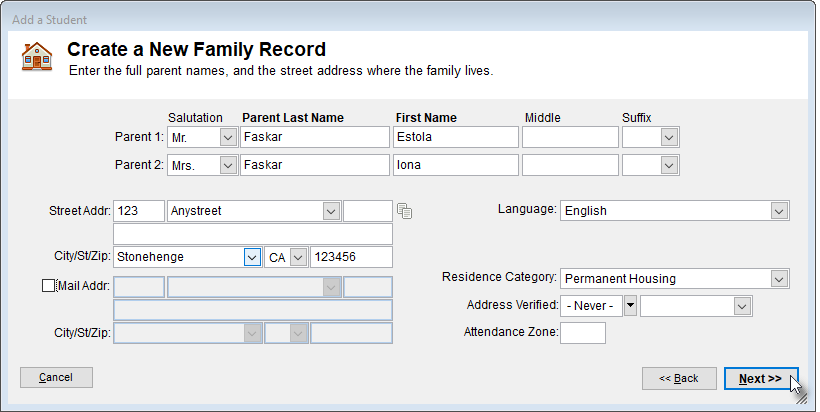
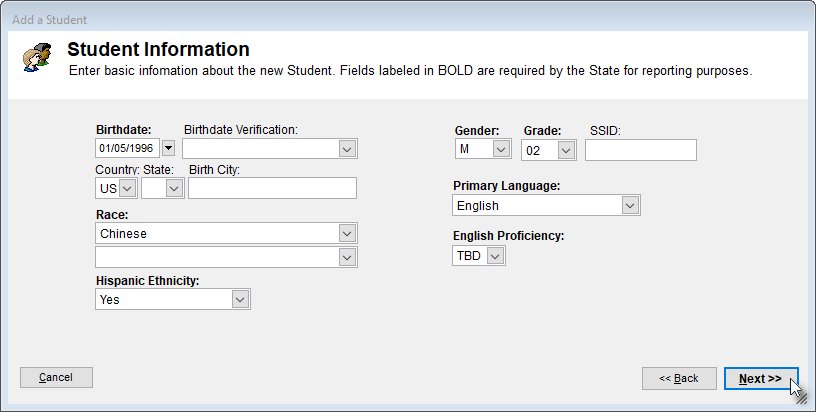
STEP 3 - Here is where you will fill in the required CALPADS fields and any other information that you may want to add for the household. Fill this in and then click Next.
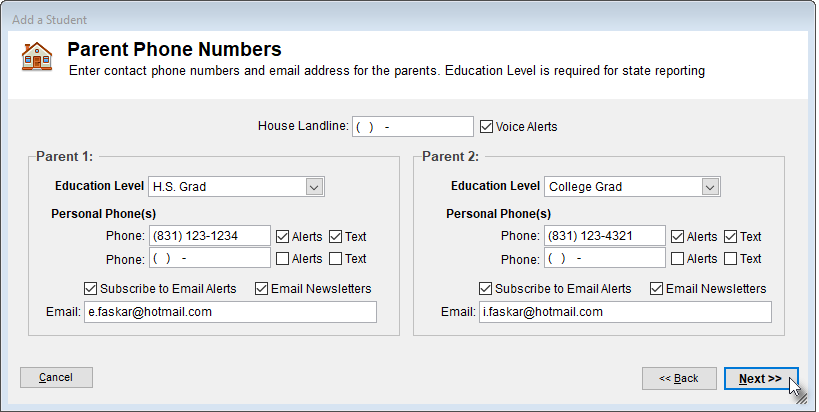
STEP 4 - On this page you will fill out phone numbers, parent education level and other contact information fields. Checking the alerts and text checkbox allows the parent to receive alerts/texts, but does not turn on alerts/texts until specifically designated on the student relationship page later on. The same goes for email alerts/newsletters. Click Next when done.
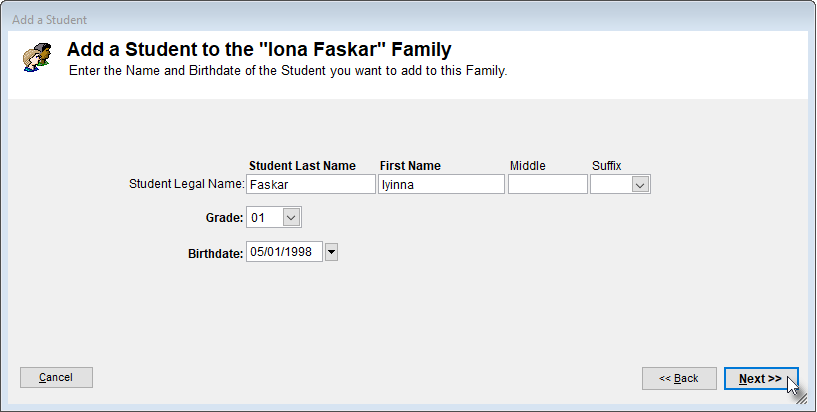
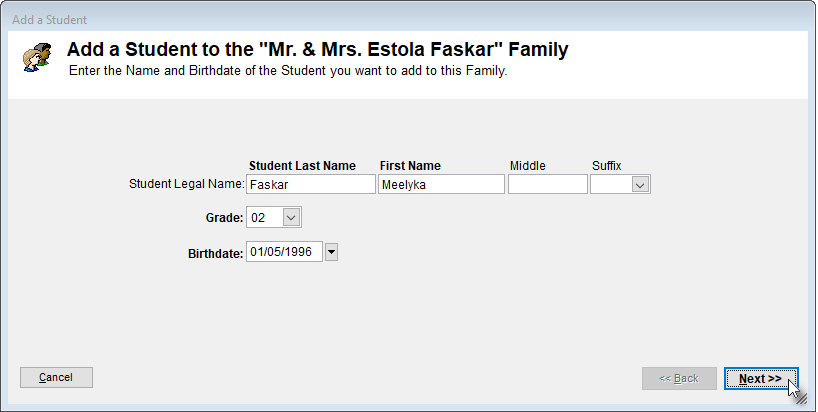
STEP 5 - Once you have filled out the household information, the wizard will pull up the student entry form for you to fill out. Here you would enter the name of the student, grade and birthdate. Then click Next.
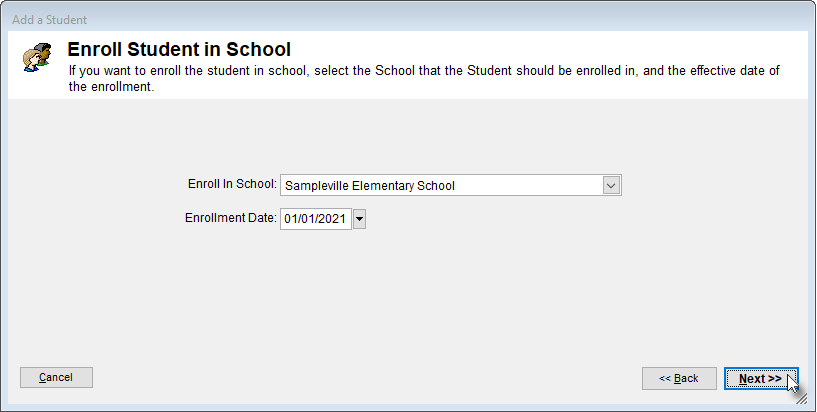
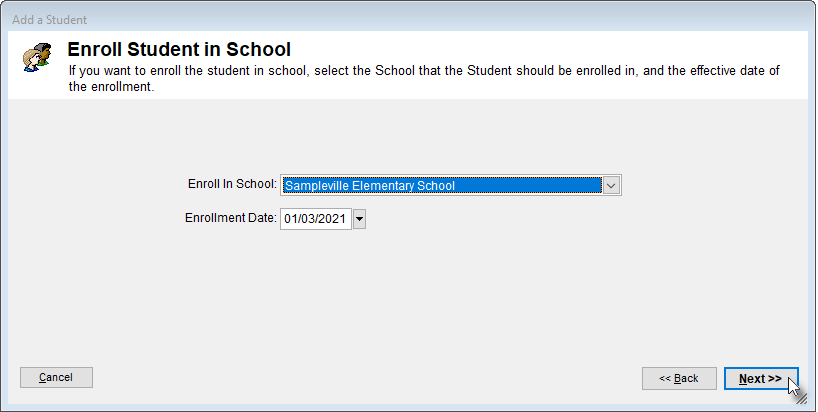
STEP 6 - Choose which school and what date to enroll the student. Then click Next.
STEP 7 - The next to last step is to fill out the CALPADS required information fields below, then click NEXT. 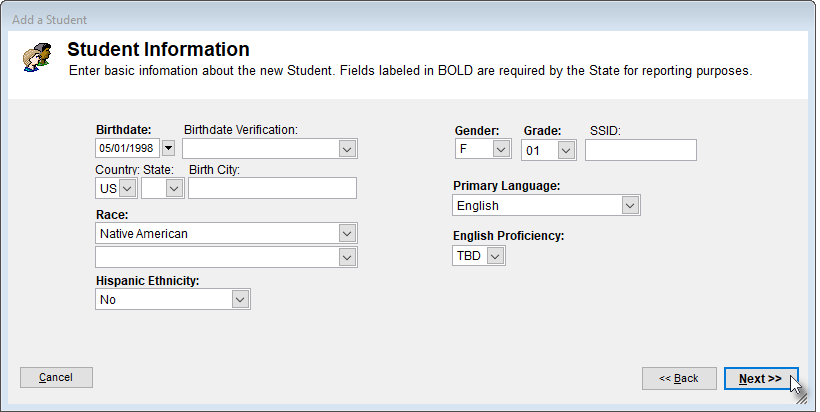
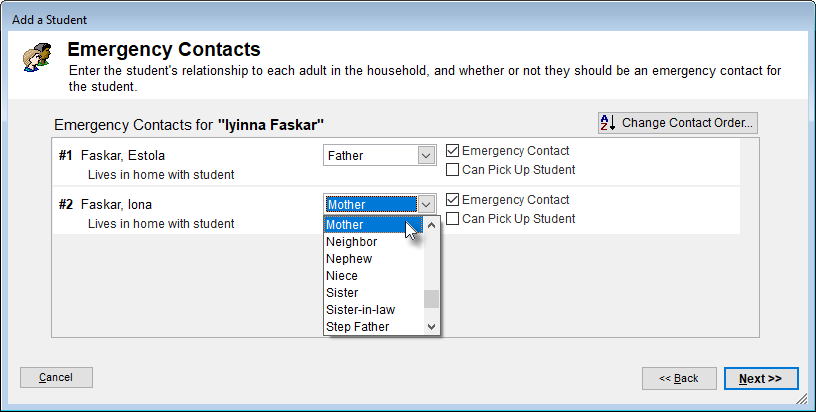
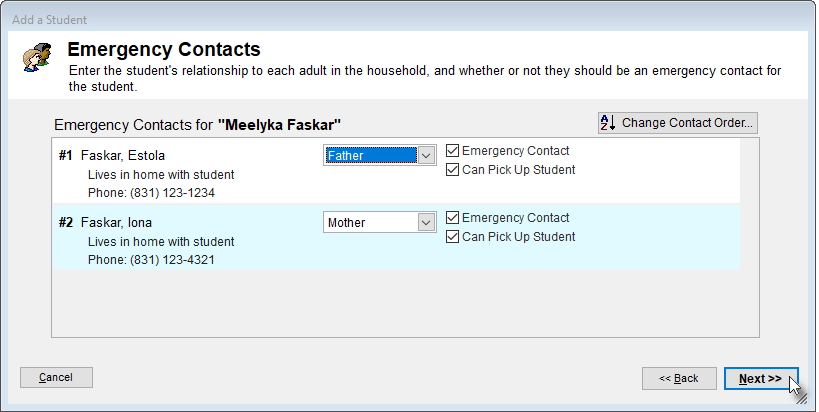
STEP 8 - Here is where you setup the student relationships. This is a very important part of the process as Alerts/Texts/Reports all rely on this relationship to be setup. If you are setting up a new database or would just like to review your data to make sure this is setup correctly for all students please run the report called: List Students with No Relations set for Parents.
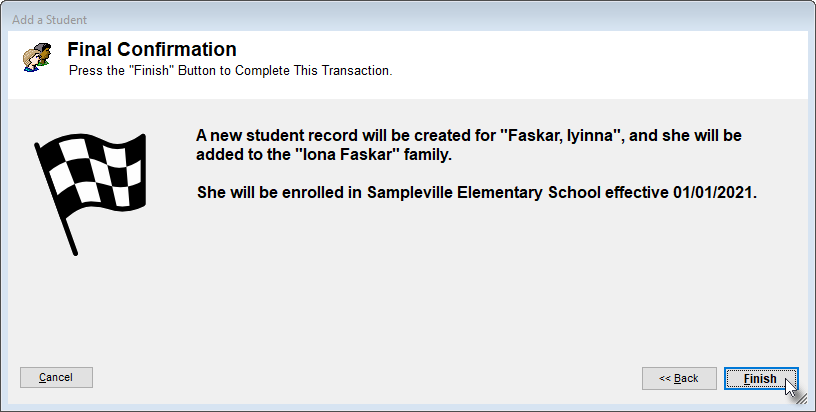
Once you've clicked NEXT and then FINISH your Family will be saved to the database.
How Do I Add a Student to an Existing Family?
Left click on the Siblings living in same Household folder, and then click the Add a Student to this Household button as seen below. Once you do this proceed through all of the same prompts as noted above to add the required information as seen in the screen progression below, clicking Next after each screen till you get to Finish.
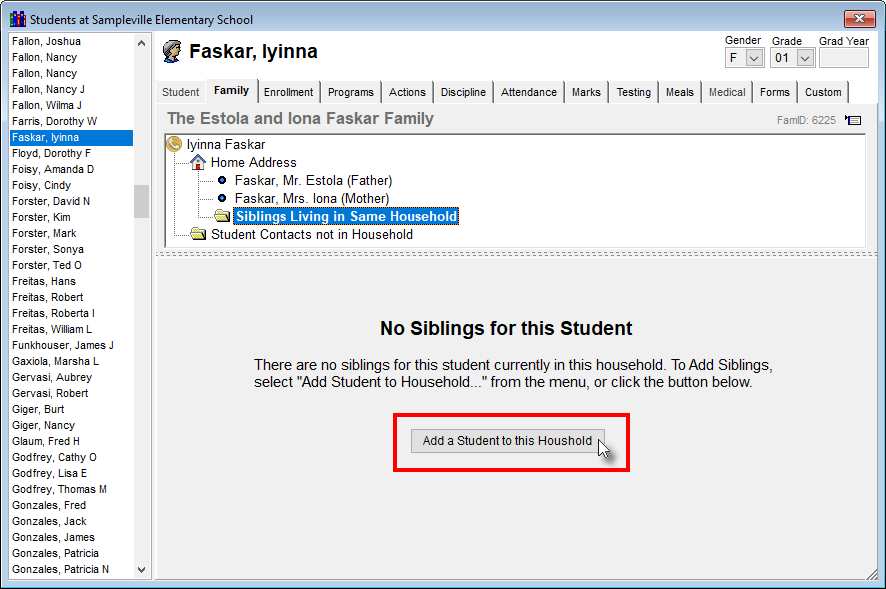

Once you have clicked on FINISH - the student will now show up under the Family.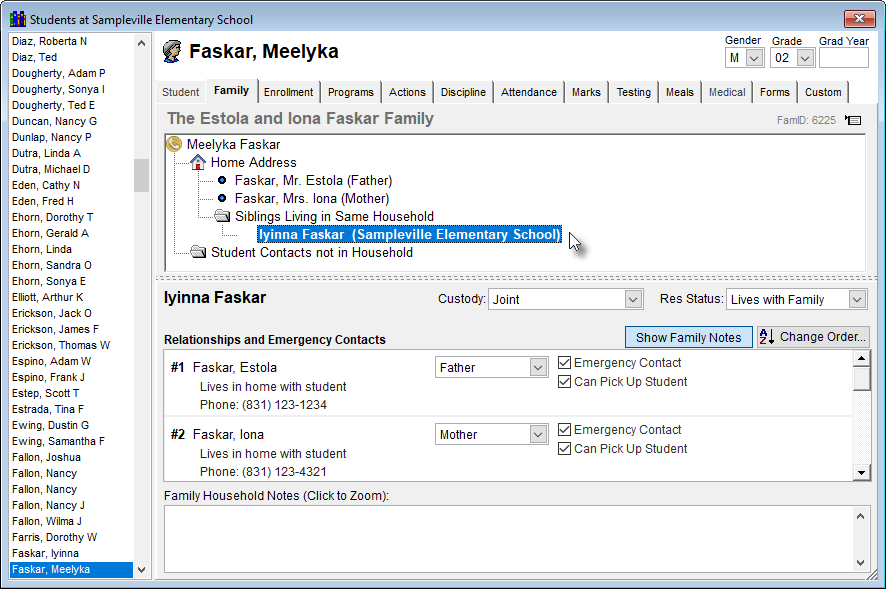
How Do I Move a Student to a Different Family?
You can move a student from one family to another by adding the student to the desired family.
Method 1 - Step 1: Open the student form family tab for the desired family, right-click on the home address, and select Add a Student to this Household.

Method 1 - Step 2: Enter the student information (last name, first name, grade, and DOB). A search will be conducted to see if the student is already in your SIS. Select the existing student to remove the student from the old family and add the student to the new family.

Method 2 - Step 1: Open the student form, right-click on any student name, and select Add a new Student/Family.

Method 2 - Step 2: Enter the names of the new parent(s)/guardian(s). A search will be conducted to see if the new parent(s)/guardian(s) are already in your SIS. If the family already exists, select that record. If the family doesn’t exist, you can create a new family record.


Method 2 - Step 3: Enter the student information (last name, first name, grade, and DOB). A search will be conducted to see if the student is already in your SIS. Select the existing student to remove the student from the old family and add the student to the new family.