Navigation
The gradebook link identifies the gradebook type. Clicking on the green Grades button opens the letter gradebook for that particular course.

When you open a gradebook, the top of the screen includes a menu. If you click on the name of the course section (Math 6 in this example) the menu opens up to allow you to choose gradebooks from other classes.
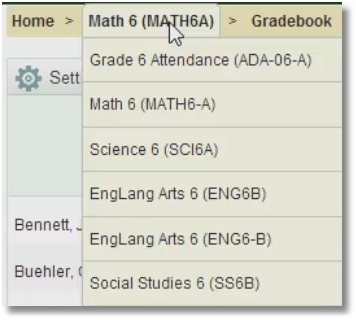
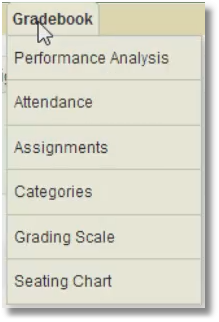
The next menu to the right is for the Gradebook options.
Adding Categories
Begin by setting up your gradebook categories (at least 1 category needs setup). Categories are types of assignments such as quizzes, tests, homework, etc. When you click on the Categories button, the form below is displayed.
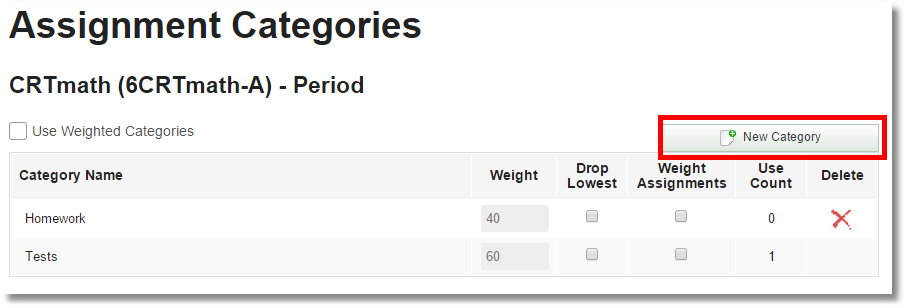
Click on the New Category button to add a category.
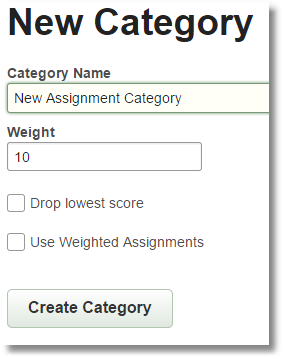
Checking the “Use Weighted Categories” box causes the calculated average to respect the category weights. It makes sense to have the categories add up to 100. In this example, the Homework category has a weight of 40 (the calculated average of all the assignments in the Homework category are worth 40% of the overall grade) and the Tests category has a weight of 60 (the calculated average of all the assignments in the Tests category are worth 60% of the overall grade). If you use weighted categories, make sure at least 1 category has a weight >0.
You can choose to drop the lowest score of any individual assignment in each category by checking the “Drop Lowest” box.
Checking the “Use Weighted Assignments” box causes the calculated average to respect the assignment weights (this gives you the ability to weight individual assignments within a category).
Calculations: Points vs. Weights
The gradebook can calculate the course average using 1) only total points or 2) with a combination of points and weights. At the simplest level the points of an individual assignment are used to calculate the grade for the assignment. For example, if an assignment is given 100 points and a student scores 82, 82/100 = 82%. Similarly, if an assignment is given 50 points and a student scores 37, 37/50 = 74%. If no weighting is applied, the final grade will be the total points earned across all assignments divided by total points possible across all assignments.
With weighting you can determine the weight of individual assignments within the average at both the assignment and the category levels. For example, within a category such as Tests or Class Work you can weight all the assignments the same or weight some heavier than the others. You still need points to calculate the percentages for individual assignments (e.g. 37/50 = 74%) but beyond that the points are of no consequence. At the category level you can weight categories such as Tests (perhaps 60%) or Class Work (perhaps 40%) for the final quarter or trimester average.
Setting up Grading Scales
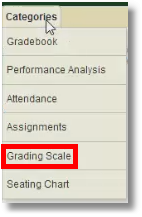
Clicking on the Grading Scale brings up the form below.
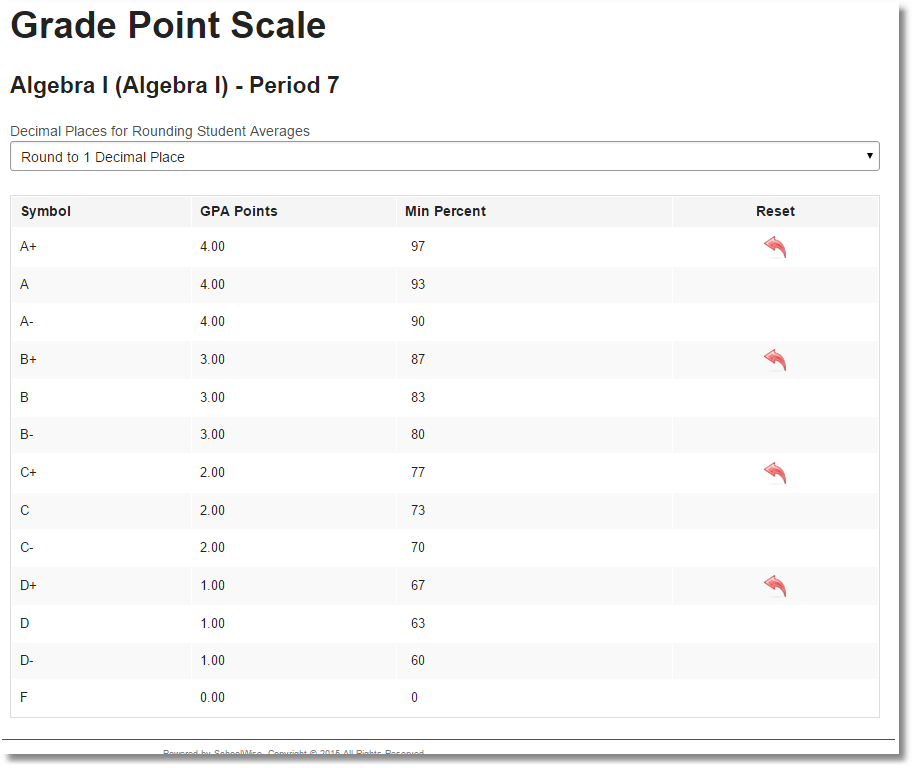
The default grading scale setup in the SchoolWise desktop marking system is normally used for all letter-grade gradebooks. Click here for more information on the desktop marking system setup.
If enabled, teachers may change their gradebook grading scale min percent value required for a grade but a best practice would be for the whole school to agree on one default grading scale.
The Reset arrow is enabled in a gradebook if the default grading scale has been changed. Clicking the Reset arrow causes the changed value to revert back to the default grading scale.
For letter-grade report cards, teachers determine the report card mark. The Min % in your marking system table is used to calculate the average mark based on the assignment marks for a specific course but teachers don’t have to use this calculated average mark for the report card mark. For the report card mark, the calculated average mark can be used or it can be overridden by the teacher to use any letter mark in your marking system table.
The Decimal Places for Rounding Student Averages menu sets the way rounding occurs in the gradebook.

Adding Assignments
From the gradebook click either the New button or the Add Assignment Column.

Enter the assignment title, category, points, due date, and due date sequence number (default value is 1, higher numbers mean newer assignments within the same date).
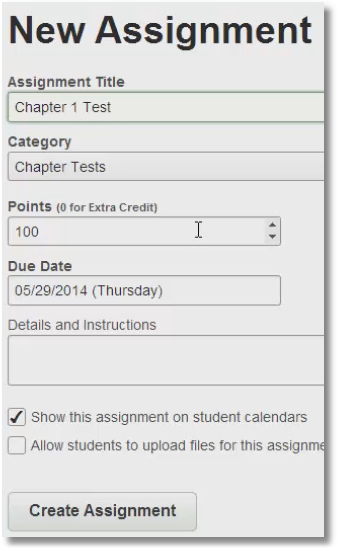
Extra Credit: If you set the points to zero the assignment becomes extra credit. The calculated student average shown in the gradebook can be >100% when you give extra credit. This calculated % is not shown on the report card, only the letter grade is shown.
Extra Credit Warning: If you use weighted categories, do not create a separate category that only includes extra credit assignments. The calculated average for this category would create a math error (X points / 0 points) that significantly impacts the calculated overall grade for the course.
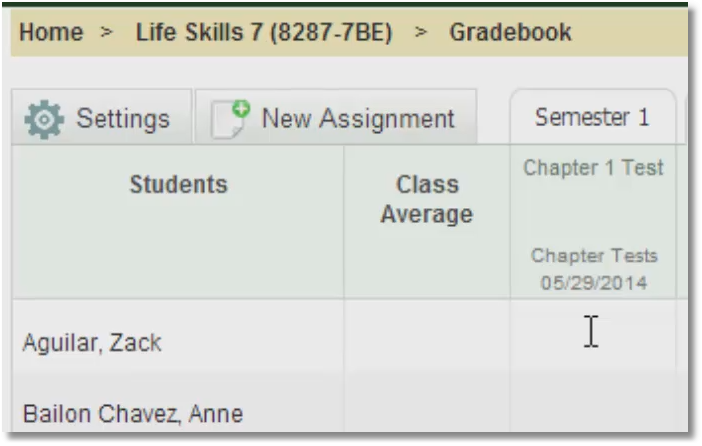
Going back to the gradebook we see the ‘Chapter 1 Test’ is there. Typing in student scores causes the class average calculation to populate.
Add Assignments to Multiple Classes at Once
Teachers can add new assignments to more than one class section at the same time. At the bottom of the New Assignment dialog, you can choose a number of ways to select which sections to add the new assignment to. For this feature to function properly, each section to which you want to copy an assignment must have identically spelled Assignment Category names.
Add Assignment to this section only
The new assignment will be added to the current section only. This is the default setting.
All my sections of this course
The new assignment will be added to all your sections of the same course. For example if you teach three sections of Grade 5 Math, you can choose this option to add the new assignment to all three of those math sections. If the other sections do not have a matching Assignment Category, the category from the current section will be copied to the other sections. This option is only available if you teach more than one section of the same course during the same marking period. Please note that if one section has an assignment category of “Test” (singular) for example and a separate section has an assignment category of “Tests” (plural), a new category of “Test” (singular) will be created in the second class and perhaps affect your assignment category calculations in ways you did not plan for. This is why Assignment Categories must be named consistently between sections.
All my sections that have a matching category name
The new assignment will be added to all your class sections that have the same Assignment Category defined spelled exactly the same. For example, say you teach 5th Grade English, 6th Grade English, and 5th Grade Math. If both of your English sections have a category named “Essays” (and your Math class doesn't), then you can add the same Essay Assignment to both English classes using this option.
Entering Student Scores
Student assignment scores are entered as numbers (points). The numeric scores (points) determine the average calculation. If an assignment has a point value of 100, then entering 90 calculates as 90%. If an assignment has a point value of 5, then entering a 4 calculates as 80%. Giving a student scores of 99 on one assignment and 0 on another assignment results in the following average (without any weighting).

Entering Notes with Scores
If you enter any letter (except M) the value is ignored, and essentially excused.

Even if you type in an F it still has no effect.

This note feature is useful because it allows you to enter a number, then a space and a short comment. An example could be if a student turns an assignment in late, you could enter something like 70 late. It will calculate the 70 but you still can see the comment.

Let’s say a student is having issues at home or is just having an off day. If you enter text first and then the number the score will be ignored.

Marking Assignments as Missing
Use the letter M to indicate Missing assignment.

A score of M calculates as a zero and includes the assignment in reports to find students with missing assignments.
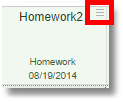 Set same score for all students
At the top of every assignment column in the grade-book is a three-line “hamburger” menu button.
Clicking on this menu displays:
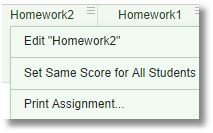
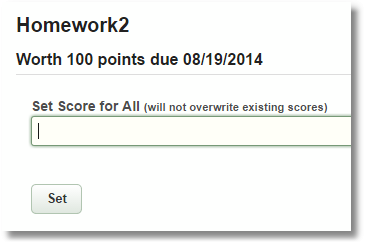
Choosing Set Same Score for All Students allows you to enter a value that will be copied to all students in that column for a given assignment. If you have any previously set scores they will not be overwritten.
How to Import Google Classroom Assignment Grades
Goggle Classroom Limitations:
Google Classroom does not utilize marking periods. Grades are calculated for the duration of the class. If you want to begin grading again for a new term or semester, you have to create a new class.
When you export Google Classroom grades, grade categories are not exported.
It is not feasible to import Google Classroom class assignment grades into standards-based gradebooks since real standards-based gradebooks use assessments that include 1 or more skills and every skill would have to be mapped manually to the specific skill sets and rubrics used in your SIS gradebooks.
Google Classroom grades for a specific class assignment can be imported into a SchoolWise letter gradebook as follows:
Step 1: Ensure the Google Classroom student email address matches your SIS student email address. This email address is used as a key for importing grades.
Step 2: Download your Google Classroom class assignment grades to a comma-separated values (CSV) file as follows:
Sign in to your classroom.google.com account and click your specific class.
At the top, click Classwork and then click the specific assignment and then click View assignment.
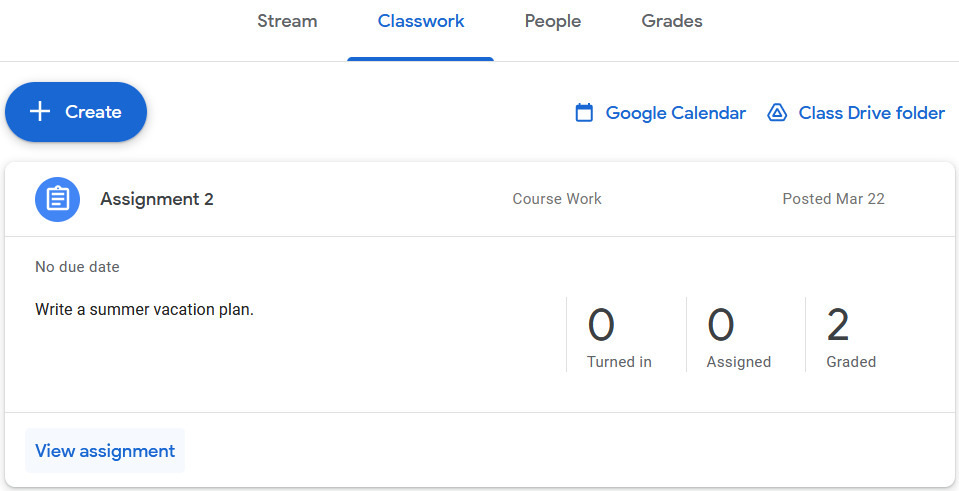
On the Student work page, click the Settings wheel on the right and select Download these grades as CSV and save the csv file to your computer. Do Not Download all grades as CSV (we can’t import all grades in one csv file because of Google Classroom limitations).

Step 3: Create a SchoolWise letter gradebook assignment in the course of interest and marking period for which you want to import grades.
Note: You can not overwrite existing gradebook assignment marks (you have to delete existing gradebook assignment marks if you want to import new marks).
Step 4: Import the Google Classroom class assignment grades for that specific gradebook assignment as following:
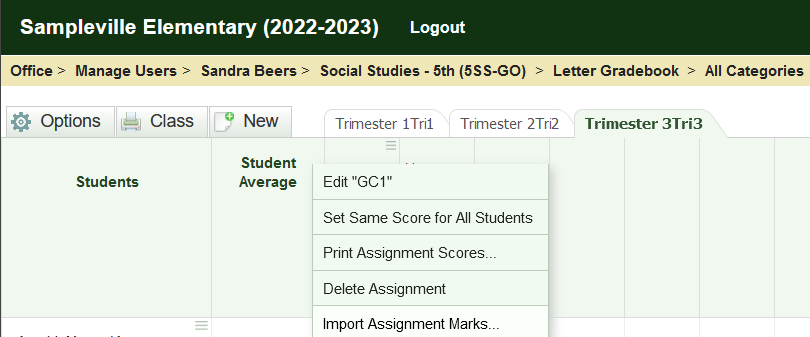
Click the hamburger menu at the top of the gradebook assignment column and click Import Assignment Marks.
Click Browse to select the csv file previously saved to your computer and then click Import Marks.
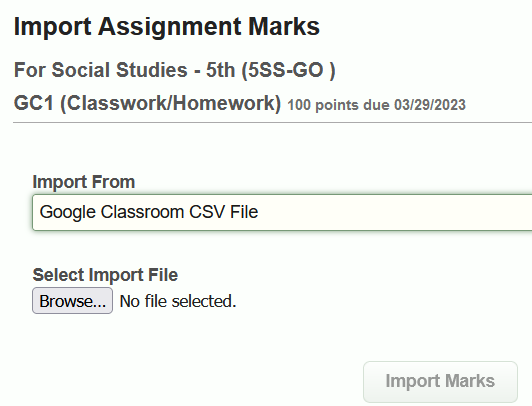
Note: Google Classroom class assignment grades >9999 will be imported as 9999 (the max point limit in a gradebook).
How to Delete an Assignment
Assignments can be deleted only if you delete all the scores entered in first.
From the gradebook, make sure there are no scores for any students in the assignment you wish to delete. Go to your homepage.

![]()
At the far right side of your list of classes is a little gear symbol:
Clicking on it brings up the Assignment List.
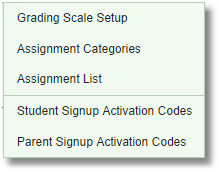
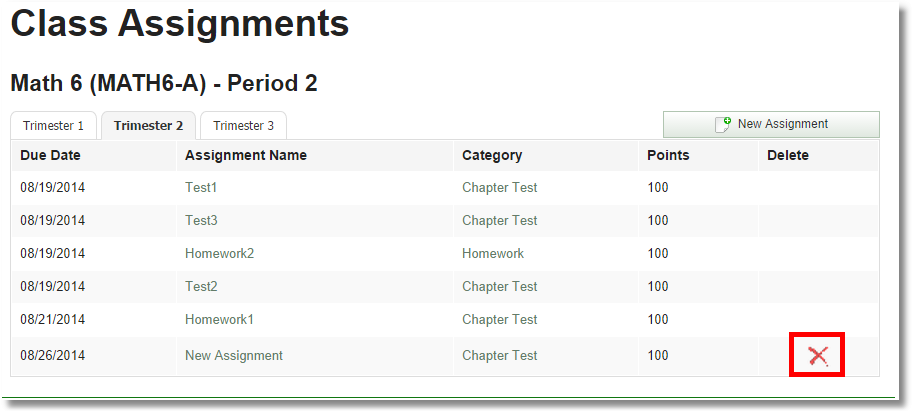
The only assignment that can be deleted (because there are no student scores in it) will have a red X in the Delete column. Click the red X to delete the assignment.
Filtering the Gradebook by Category
It is possible to filter the gradebook to only see assignments in one category, along with the category average.

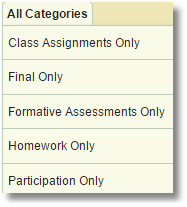
Clicking on the menu All Categories displays a list of all of your categories:
Clicking on any one category then causes the gradebook to show only assignments in the selected category along with the category average.
Selecting All Categories turns off the category filter.
Semester Averaging of Quarters

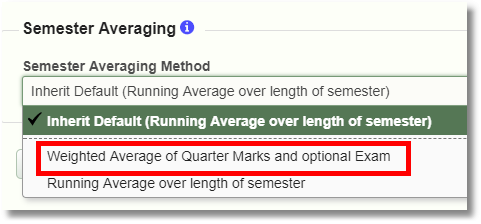
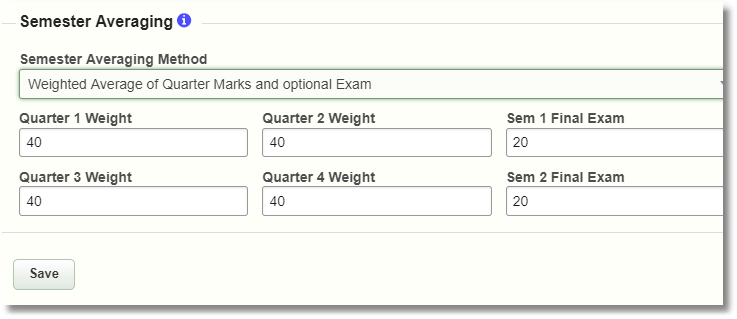
In high schools there generally are two semesters per year, each with two quarters and perhaps progress or deficiency notices under the quarters. Semester grades can be either a running total of categories and assignments disregarding the two quarters or an average of the two quarters. The running total can be deceiving because if you don’t use all of the same categories in both quarters the semester average may not be what you expect even though it is mathematically accurate. The reason to use the running total is to monitor the progress of students towards passing a class necessary for graduation. But in most cases teachers will want to us a simple average of the two quarters for the semester grade. Below is what a high school gradebook looks like, set up with quarters and semesters.
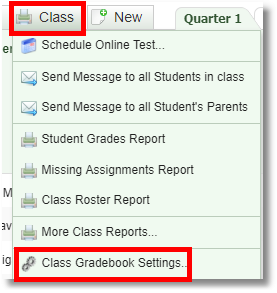
Semester Averaging is set up from the Class menu, which opens up the Semester Averaging form.
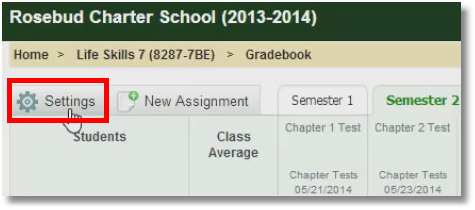
Settings Menu
Report Card Marks
Report card marks can be entered or edited in the teacher gradebooks or in the Desktop student's marks form.
Note: Calculated average marks are dynamic (live). Letter-Grade Report Card marks are static (frozen). The calculated average and report card marks may or may not be the same.
For letter-grade report cards, teachers determine the report card mark. The Min % in your marking system table is used to calculate the average mark based on the assignment marks for a specific course but teachers don’t have to use the calculated average mark for the report card mark. The calculated average mark can be used for the report card mark or it can be overridden to use any letter mark in your marking system table.
Tip: For those only using the gradebook to enter report card marks, you don’t need to create any assignments. You can just enter the report card marks (letter grade) directly in the report card Mark column.
Show Report Card Columns
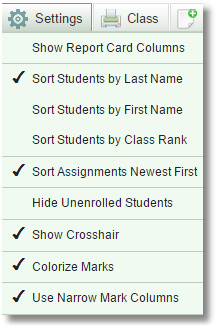
Clicking on the Settings menu and then Show Report Card Columns results in the report card columns being displayed for the selected marking periods (eg. quarters, semesters, trimesters, or progress report sub-periods). 
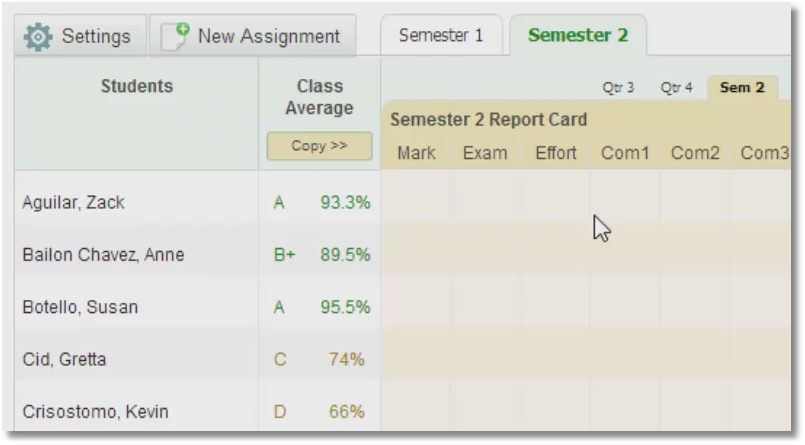
By first choosing the proper marking period, you can then click the Copy>> button to copy all the current grades into the Mark column. Putting your mouse cursor into the Mark field and then clicking Copy>> will cause the grades to be copied into the mark field. Be very careful that you are in the appropriate marking period before copying (eg. quarters, semesters, trimesters, or progress report sub-periods).
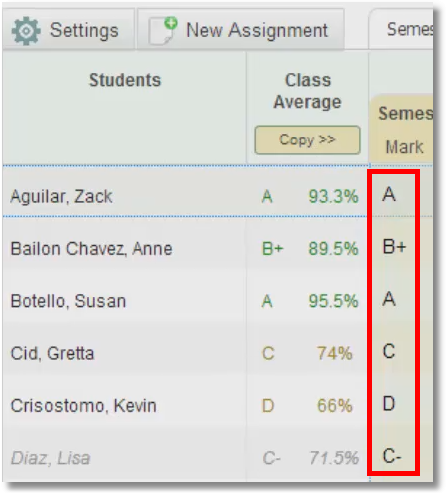
By default, Letter-Grade Report Card Marking Periods are unlocked 3 weeks before the current term ends, and then locked again 30 days after the term ends. Teachers are only able to enter or change report card marks when the marking period is unlocked. School administrators can override the default date-based lock behavior by manually locking or unlocking each marking period in the school gradebook settings.
Adding Report Card Comments
If enabled, letter gradebook report card comments can be added for each course with a free-form text field (Notes) that accepts 1024 characters max or a comment code number (max 4 comment codes can be added).
There are 2 gradebook settings that impact letter gradebook report card comments:
1. Admin/Course Gradebook Settings/School Gradebook Settings: You can enable text comments (Notes) and/or numeric comment codes (pick list) for your school. Click here for help.
2. For a teacher to enter report card comments, their Letter Gradebook report card columns must be turned on (default is off) within each specific gradebook from the options link.
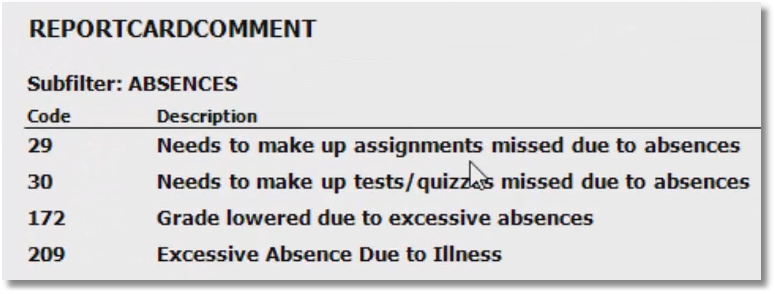
To see your specific list of Report Card Comment Codes, you can run the web report titled “Letter Grade Report Card Comments List” or you can run the desktop report titled "Picklist Items" with the filter set to ReportCardComment. Your report card comment code number pick list is setup/edited from the desktop district setup menu.
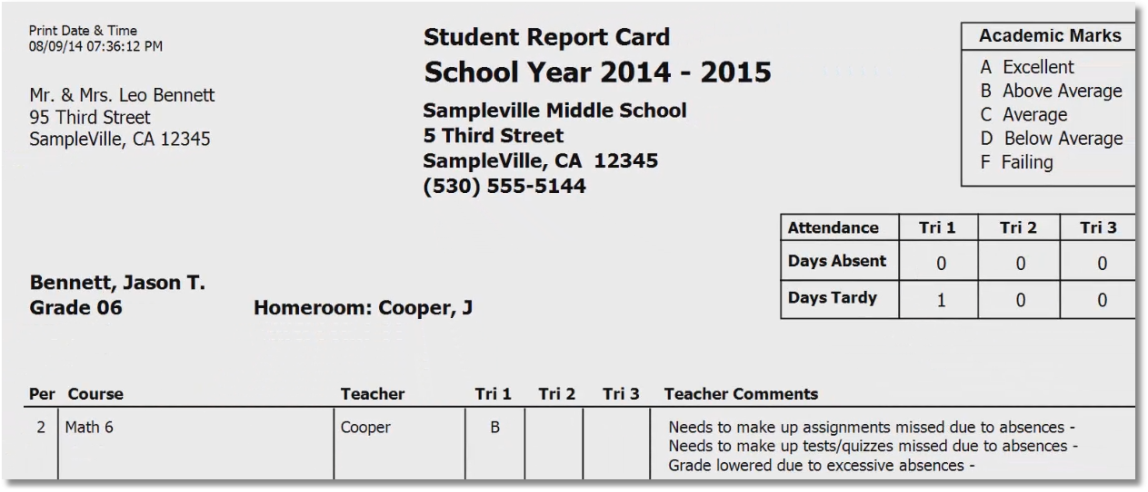
Ultimately all of the marks and comments will make up the report card.
Other Settings Menu Choices
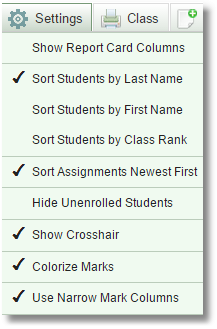
Sort Students by Last Name is the default alphabetic order.
Sort Students by First Name means just that.
Sort Students by Class Rank sorts from highest to lowest average in the class.
Sort Assignments Newest First arranges the assignments across the grid from newest to oldest and unchecking sorts form oldest to newest.
Hide Unenrolled Students does not display students who have transferred out of the class and unchecking this option displays them in grayed-out italics. Note: When unenrolled students are hidden and you use the Copy>> button to copy all the current grades into the report card Mark column (as explained above), the marks for unenrolled students will NOT be copied to the report card column. However if the unenrolled students are NOT hidden, their marks will be copied to the report card column.
Use Narrow Mark Columns shows the assignment names vertically as opposed to horizontally. The vertical display allows you to place twice as many assignments into the visible area of the gradebook.
Exploring the Menus and Buttons

Clicking the menu to the right of a class name opens the following menu:
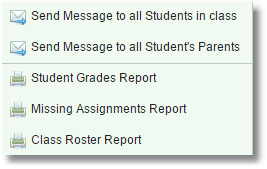
Here you can send a message to all students or to all parents as well as print reports that include all the students in the class.
Send Message to all Students in class and Send Message to all Students’ Parents enables you to send a message to either of those groups.
Class Reports
These reports will bring up records for each student in the particular class you have open in the gradebook. Clicking on the Class printer button brings up a list of permanent reports: Student Grades Report, Missing Assignments Report, and Class Roster Report. Clicking on the More Class Reports button brings up a list of reports, which will be growing daily.
Student Grades Report
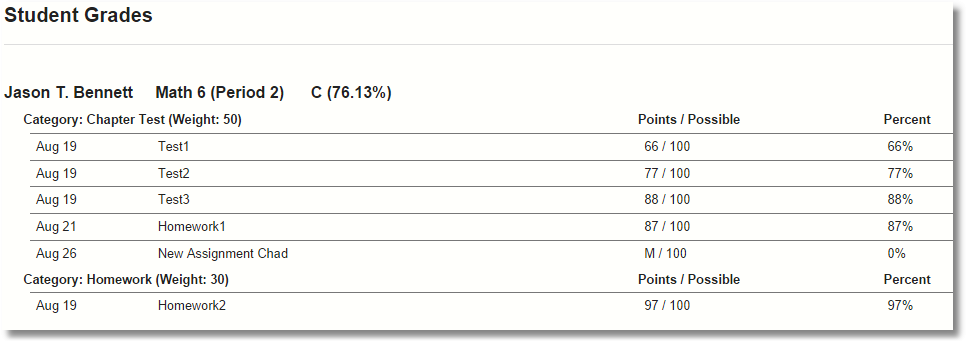
Missing Assignments Report

