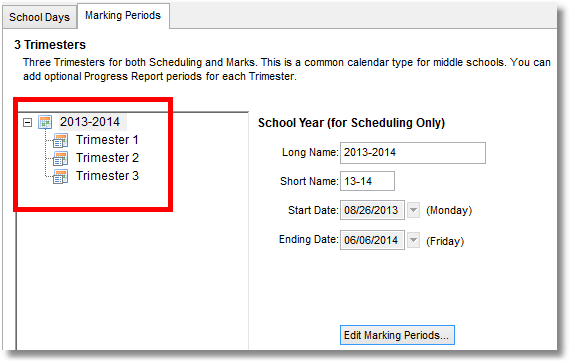
Your SchoolWise calendar and marking periods (semester, quarters, trimesters, etc.) need to be set up by SchoolWise support.
It is crucial to pay careful attention to: academic school year start/end dates, ADA months, day type, total in-session days (instructional days), and marking periods.
Once your calendar is setup, it's a good idea to verify everything by running the desktop reports called: "School Calendar – Academic Months" and "School Calendar Marking Periods".
Note that minimum days are not marked in the calendar.
You can view your calendar in the SchoolWise desktop app and change the day type for a specific date if needed. See below for more information.
You can view your calendar in the SchoolWise web app but you can’t make any changes.
Note: Once marks have been entered, the calendar marking period cannot be altered. However, an alternate calendar track can be added if you want to setup new classes using an alternate marking period.
School Calendar School Days
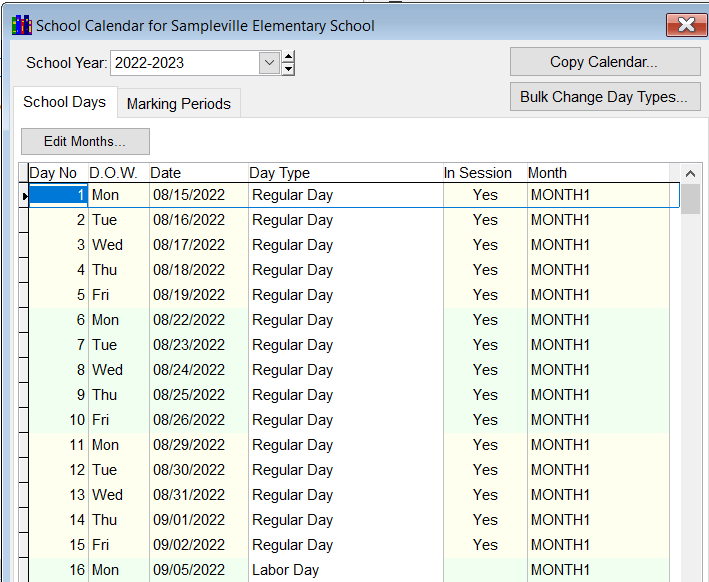
From the File menu in the desktop system, click on District Setup and then School Calendar Setup. When the school calendar opens, the School Days tab will be shown.
For in-session days (instructional days), the day type should be set to regular, distance, or mixed.
For non-in-session days (non-instructional days) the day type should be set to an appropriate type (ex holiday, staff day, snow day, etc.)
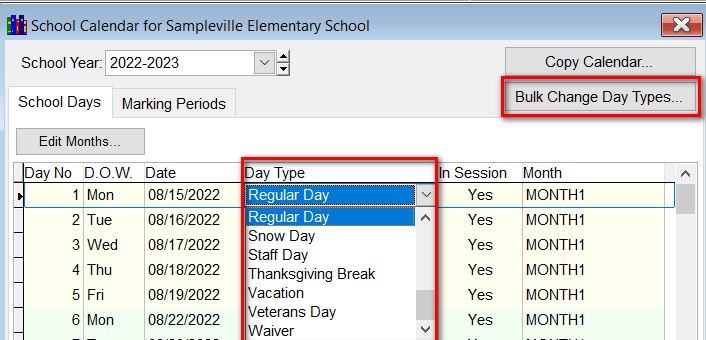
The day type for a specific date can be changed by clicking the day type and selecting the desired option (such as Emergency Closed Day). If a school calendar date is changed from an in-session day type to a non-in-session day type, attendance exception records previously created need to be cleared.
To change the day type in bulk, click on the Bulk Change Day Type button and then select the new day type and enter the effectivity date.
Note: Once setup, changes to the school year start/end date may require the student class map to be recalculated.
School Calendar Marking Periods
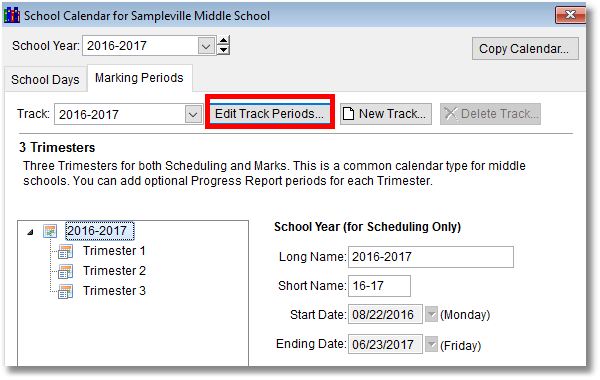
From the File menu in the desktop system, click on District Setup and then School Calendar Setup. When the school calendar opens, click on the Marking Periods tab.
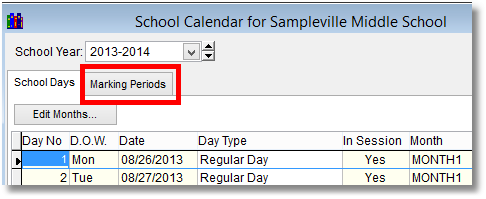
Click on the Marking Periods - Edit Track Periods button.
Note: Some schools use dual track marking periods.
Choose the type of marking period from the menu.

Note: If a school only has an annual period (ie. 'Full Year - No Marks'), no marks can be entered in the Desktop and Gradebooks cannot be used. This calendar type is used for scheduling only.
If choosing trimesters, for example, you will be prompted to enter the ending dates of the terms.
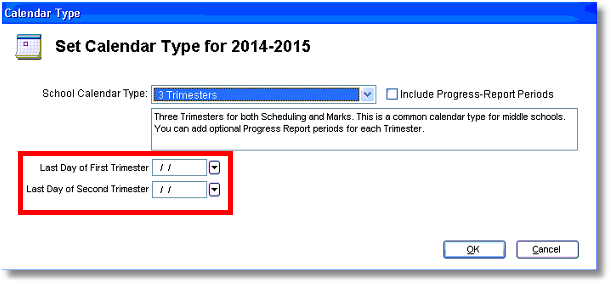
You may include progress report sub-periods by checking the Include Progress-Report Periods box.
Click OK to create the marking periods.
